 |
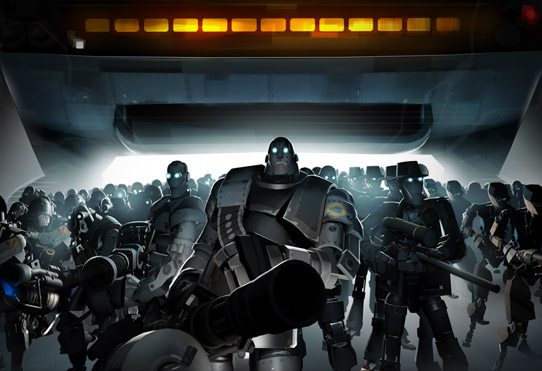
| ROBOTS! |
If you've ever played Team Fortress 2 (or even only heard of it), then you most likely know about it's Co-Op mode, Mann vs. Machine, in which the game's unique nine classes have to defend Mann Co. bases from a horde of Robots carrying giant bombs. If this is your first time hearing the name "Team Fortress 2", by all means, go to the game's website and find out more about it. It's a free First Person Shooter that features nine classes with their own unique personality. Each class is a part of a unit (Offense, Defense, and Support). In the offense unit, there's the super fast Scout, the Rocket Launcher wielding Soldier, the Pyro and his Flamethrower. In the Defense Unit; the Demoman with his Sticky Bombs and Grenade Launcher, the Heavy with his Minigun, and the Engineer, who can build Sentry Guns and Dispensers. In the Support unit is the Medic with his healing Medigun, the Sniper with his...well, sniper rifle, and the Spy, who can disguise as other members of the team and stab them in the back to instantly kill them. The game specializes in strategy and team cohesion, emphasizing the need to work together, as each class has a drawback. For example, the Scout is the fastest, but has the lowest health. The Heavy has the highest health and a powerful weapon, but is the slowest and is very big, making him an easy target. Each class has a weakness that can be exploited by another class, thus creating the need for teammates to support each other.
Mann Vs. Machine brings six players against waves of Robots that mean to deliver a bomb to their base. Obviously, if they succeed in planting in the base's hatch, the wave is lost. Players can collect Credits dropped from slain enemies which they can use to upgrade themselves at Upgrade Stations, with the Credits being evenly distributed amongst team members. Mann Vs. Machine is a bit different than the traditional multiplayer of Team Fortress 2. Aside from the obvious things (it being Co-Op, there being robots, etc), Mann Vs. Machine is the only mode in Team Fortress 2 where you'll get scolded by your fellow players for bringing a certain type of loadout to the game. In the regular multiplayer, every unlockable weapon has the potential to be efficiently lethal, but not so in the Co-Op mode. For example, I doubt that I will find a single gamer familiar with Mann Vs. Machine who would disagree with me that the Soldier and Demoman's new item, the B.A.S.E Jumper, which is essentially a parachute, is entirely useless in the Co-Op mode.
| The B.A.S.E Jumper |
The ability to slowly glide down to the ground doesn't really help that much when there's a large swarm of Robots all firing in your direction. And that's not even mentioning the Sniper Bots. The Scout's Atomic Bonk cola, which makes him unhittable with the cost of being unable to use his weapons, serves no use either. The Engineer's Gunslinger, with the ability to build only a small sentry, can also be disregarded. Players not only have to be more careful of what weapon they pick, but which class they play as. In contrast to the regular multiplayer, where teams are evenly numbered, Mann vs. Machine has six players against a vast army of Robots. Crowd control, thus, becomes a major concern. Snipers, Medics, and Spies lack the firepower to counter the hordes of metal men barreling at them, so teams that have multiple players using these classes will cause a drop in the damage dealt to the enemy.
Veteran players of Mann vs. Machine may recognize these issues, but players who are new to Mann vs Machine may not realize that they may not be able to play as their favorite class or use the new weapon they just got. In order to do well in Mann Vs. Machine, some guidelines must be followed, and certain weapons should be used. Unlike regular multiplayer, there are fewer strategies that will work in Mann vs Machine unless you have a team that is "just that good". But since such teams are rare to find, it may be best to try to follow some rules of thumb that will be laid out in this guide. If followed, they should substantially assist in your endeavor of slaughtering Robots and defending your base.
Class Breakdown:
Scout:
Because Mann Vs. Machine is a defensive mode by nature, the Scout is at a disadvantage right off the bat, with his low health and close range weapons. However, he has a higher gather radius for Credits, and gains a health boost whenever he picks them up. The more Credits in one pile, the higher the health he receives. This makes the Scout a natural at making sure that all Credits are picked up, so that the team can buy better upgrades at the stations. Since the Scout is more of a support role in Mann Vs. Machine, any more than one on the team is unnecessary.
Arsenal:
Primary: Back Scatter
Why?: The Back Scatter grants mini-crits to enemies when attacking from behind. As the Scout should always be on the move, chances are there will be times that he will catch up to Robots who are too busy to notice him. This will allow the Scout to do hard damage to enemies.
Secondary: Mad Milk
Why?: Enemies doused in Mad Milk grant health to players who shoot at them. This can be immensely useful to Heavies, who are trying to mow down Giant Robots. In addition, Mad Milk can be upgraded to slow enemies down significantly, delaying the delivery of the bomb.
Melee: Fan of War/Sandman
The Fan of War marks enemies hit with if "for death", meaning that all damage done to them will be mini crits for a short time. This will allow the team to do more damage to Giant Robots. The Sandman can also be a good choice, as its baseball can be upgraded to also mark enemies. The drawback, however, is that the Sandman causes the Scout have less health than he normally would.
Upgrades:
The Scout should not worry about upgrading his primary weapon. As counter intuitive as that sounds, the sad truth is that the Scout's weapons are meant to be lethal in close range to one enemy at a time. The Scout should only need his Primary Weapon when attempting to push past smaller enemies. Larger enemies are obviously more powerful, and, most of the time, they can take out a Scout too easily and quickly for them to do any real damage with their primary weapons. Instead, Scouts should upgrade the Mad Milk and their resistances and Speed. Being able to run incredibly fast, and having high resistances to damage, will allow the Scout to weave around enemies, scooping up Credits, which should heal health lost. Many enemies will be attempting to kill you, and them focusing on you will grant the other team mates an opening.
Soldier:
With the high damage and blast radius of his rockets, the Soldier is a good class to have in any round. Upgrading his weapons properly will make him very effective against waves of regular robots and the Giant Robots. In addition, the Soldier has banner weapons that, when used, give certain boosts to players near him, thus even giving him a supportive edge. His Rocket Jump can also be useful for shortcuts or quick, desperate get aways.
Aresenal:
Primary: Beggar's Bazooka
Why?: The Beggar's Bazooka has the ability to fire off multiple rockets in one go. Need I say more? Upgrading the clip size at the Upgrade Station will allow him to fire even more rockets. Combine that with a Medic with the Kritzkrieg or Crit Canteens and you can literally repel waves of enemies on your own.
Secondary: Buff Banner
Why?: The Buff Banner, once it's "Rage Meter" is full (via killing enemies), can be activated to give opponents a mini-crit boost. This can be especially helpful when dealing with robot Tanks. The Buff Banner can be upgraded to lengthen its duration.
Melee Weapon: Shovel
Why?: The Soldier's default weapon is the best one. Other melee weapons block the Medic's ability to heal with active, or only become useful if you're rocket jumping towards the enemy, which you shouldn't be doing anyway. It's best to just stick to the classic. Besides, the Soldier should only rarely use his melee weapon.
Upgrades:
The Soldier needs to upgrade his Rocket Launcher. As stated, the Beggar's Bazooka can be upgraded to fire more rockets in one go, and can also be upgraded to be loaded faster. Max out the damage, and give a few upgrades to Rocket Specialist (which will expand the blast radius as well as stun enemies) and the Soldier can take out mobs of robots on his own. A few Credits can be tossed towards resistances and speed as well, if possible.
Pyro:
In some ways, the Pyro shares the same difficulties as the Scout, since his primary weapon has a short range. However, his compression blasts becomes incredibly useful as it is one of the few ways to push the bomb carrier back. In addition, he is still very useful in countering Spy Bots and extinguishing players when they catch fire. If the Pyro is able to ambush the robots, he can deal a great amount of damage to them.
Primary: Default Flamethrower
Why?: The other Flamethrowers either take too much ammo to use the compression blast, do less damage, or can't do the compression blast at all, which is essential. As such, it's better to hang with the original (or the Rain Blower) for Mann Vs. Machine. As his weapon tends to run out of ammo fast, upgrading the ammo capacity and having Ammo Canteens is important.
Secondary: Flare Gun
Why?: The Flare Gun will do critical damage every shot to an enemy who is on fire. Upgrade the amount of time enemies stay on fire after shooting them with it, as well as the reload time, and you'll be able to do great damage with this weapon alone.
Melee: Third Degree
Why?: The Third Degree will damage everyone connected via a Medics beam. So, if there is a Giant Robot who is being healed by multiple Medics, bring out the Third Degree. If you're able to get to the Giant without being caught, a Crit Canteen may enable you to kill all of the Medics healing it. Otherwise, an Ubercharge canteen may help get close.
Demoman:
As one of the Defensive classes, the Demoman finds his knack in Mann vs. Machine. His sticky bombs can be used to guard the bomb and prevent the Robots from getting their hands on it, while blowing up several of them at the same time. And, just like in regular multiplayer, he can be helpful in destroying Engineer Bots and their buildings.
Primary: Loch N Load
Why?: The Loch-N-Load does more damage than the default Grenade launcher, and the projectiles it fires travel faster. The only downsides are its lower clip size and the fact that you must actually hit an enemy for the projectiles to explode. However, a simple Clip Size upgrade from the Stations should resolve the latter, and since the robots tend to come in hordes and the Giant robots are...well, giant...missing becomes less likely than in regular multiplayer.
Secondary: Scottish Resistance
Why?: The Scottish Resistance can lay down more sticky bombs than the Stickbomb Launcher. In addition, it can also set them off only if the player's cursor is over them, thus allowing them to set multiple "stick pits" that can be set off at different times. Use Crit Canteens or the Medic's Kritzkrieg to make the "pits" even more lethal.
Melee: Scotsman's Skullcutter
Why?: The Skullcutter has a large attack range and does 20% more damage than the regular Bottle. It's downside, however, is that it reduces the player's speed. However, Speed upgrades are inexpensive, so this can be negated entirely, thus making this weapon a great choice.
Upgrades:
Upgrading the Demoman's damage for his primary and secondary weapons is very expensive, but once they are maxed, the Demoman will be devastating, killing multiple enemies with a single shot. Upgrade the reload on his weapons (especially the Scottish Resistance), so he can fire more and lay traps faster. Use Crit-Boosted stickies to do massive damage to Tanks. Also, if you are going to use the Skullcutter, then be sure to upgrade the Demoman's speed as well.
Heavy:
With his giant Minigun and great pool of health, the Heavy is obviously a great asset to any team in Mann Vs. Machine. If a Medic is with him, he is great at stopping hordes of Robots on his own. He can also be upgraded to deflect enemy projectiles, like Soldier Bot rockets.
Primary: Brass Beast
Why?: The Brass Beast does more damage than the default Minigun. It can additionally be upgraded to fire faster and penetrate multiple enemies with its bullets, which makes it great at crowd control. It does decrease the players speed while the gun's barrel is being spun, but the damage it does more than compensates for this.
Secondary: Sandvich
Why?: Since the Heavy is great at dealing damage to hordes of robots, it's important that he stay alive. What better way to ensure his survival by carrying around a tasty snack? Also, the Sandvich can be thrown to heal other players. This is particularly useful when trying to keep your Medic alive.
Melee: Gloves of Running Urgently
Why?: The Heavy is the slowest class in the game. Thus, any way to get him to the frontlines faster is always good. The Gloves of Running Urgently are the best at doing this, without having to spend Credits on Speed Upgrades. The only drawback is that they cause all damage taken while using them to be mini-crits. However, since the Heavy has the most health, this is easily compensated.
Upgrades:
Like the Pyro, the Heavy uses a lot of bullets. Upgrade his ammo capacity and have some Ammo-refill canteens ready. Due to his already large amount of health, resistances are less important for the Heavy, though Crit Resistances are always good to have. And if you have the Gloves of Running Urgently, you won't have to worry about buying Speed upgrades. Focus on improving his primary weapon. Projection Deflection will protect you from Soldier Bot rockets, especially ones from Giant Soldiers which will sometimes always crit. The Heavy can also upgrade his primary with a "Rage" ability, which allows him to push back enemies. This can be especially useful if the robots are getting closer to dropping the bomb.
Engineer:
Every team needs an Engineer. No exceptions. With his ability to transport players to the frontlines quickly, create Dispensers for quick health and ammunition, plus his Sentry Gun for taking out large amounts of regular robots, the Engineer is vital to a teams success. If you join a team and they have no Engineer, you might want to consider selecting this class. The Robots do have a special variant in their ranks for Engineers, however, and that's the Sentry Buster, which is designed to run towards your Sentry and blow it up. The good news is that, once it reaches your Sentry, it takes a few seconds for it to actually explode. This gives you time to snatch up your Sentry and carry it to safety. Be warned that anyone caught in the blast of a Sentry Buster will die, so keep that in mind while trying to get them to explode.
 |
| Sentry Buster |
Arsenal:
Primary: Frontier Justice
Why?: The Frontier Justice racks up "revenge crits" with every kill. If it killed an enemy, you get two revenge crits, if it only assisted the kills (but didn't do the killing blow) it'll get one crit. If, at any point, the Sentry is destroyed, the stored crits will be made available to the player. The player can have up to thirty five revenge crits. This grants the Engineer better ability to aid his team against Tanks, and also better ability to defend buildings from Spy Bots. The downside of the Frontier Justice is that it has fewer rounds in its clip than the default shotgun, but this can be negated at the Upgrade Station for a fairly low price.
Why not the Rescue Ranger?: Some players suggest using the Rescue Ranger for the primary weapon of the Engineer. This weapon fires a special bolt that can repair Sentries from long distance. In addition, the Engineer can also use it to transport buildings from great distances, as buildings he wants to move will "teleport" to his possession if he has them in his crosshairs. This can greatly cut down on "travel time" and can be helpful if the Engineer is away from his buildings, but still needs to repair them. However, the Rescue Ranger has much less overall ammo than the Final Frontier, and also causes the Engineer to take mini-crit damage while carrying buildings, something that the Engineer must do frequently in Mann Vs. Machine. Due to his already low health, this makes the Rescue Ranger dangerous in times of "retreat" if the team must move back. On top of that, the Rescue Ranger's bolts don't refill ammunition of Sentries, which means that you'll still need to stay near it to keep it stocked anyway. And if you've upgraded the Sentry's firing speed, you'll need to refill it frequently.
Secondary: Wrangler
Why?: The Wrangler allows the player to take manual control over the Sentry Gun. This increases the Sentry Gun's firing radius and speed. In addition, it also causes the Sentry Gun to emit a shield that will greatly protect it from incoming damage. Players can focus their Sentries on Tanks and Giant Robots, doing great damage to them in mere seconds.The only down side is that, with increased firing speed, the bullets will run out fast, forcing the Engineer to constantly have to stop and restock the gun.
Melee: Default Wrench
Why?: Some players suggest using the Jag, which grants the player the ability to build faster, but at the cost of a damage penalty. This is indeed handy on occasion, but keep in mind that while it causes buildings to be erected faster, upgrading them still takes the same amount of time. And since the Engineer can use "Upgrade Canteens" (which are very cheap) to instantly fully upgrade buildings, it makes the Jag's perk slightly unnecessary. And while the Engineer should stay out of direct combat in most instances, he can save ammo by using his default Wrench to pummel Spy Bots trying to sabotage his devices. This becomes more of a hassle with the Jag's damage penalty, and the Wrench's firing speed can be increased, improving it's erecting AND upgrading speed, while also maintaining a higher damage output than the Jag.
Upgrades: The first thing the Engineer should upgrade is his maximum amount of Metal. This allows him to build more, and also lets him restock his guns longer before running out. Then, he needs to focus on upgrading his Sentry Gun. The Engineer is one of the two classes that actually have reason to upgrade their melee weapon (for reasons already stated). Resistances are also good for the Engineer, as he needs to stay alive to keep his Sentry Gun firing. Speed will also allow him to both get to his buildings if they are in danger and carry them out of harm's way. Consider giving upgrading the clip size of the Final Frontier if you have it.
Medic:
Until recently, the Medic wasn't a great choice in Mann Vs. Machine. But then an update was made, and he can now not only emit a shield that blocks projectiles AND damages approaching enemies, he also can revive teammates who have been recently slain on the battle field, bringing them back with full health and ammunition. Because of this, a team can benefit greatly from having a Medic on their team, especially if they don't want to spend Credits to instantly get back into the game, rather than waiting to respawn for free.
Primary: Kritzkrieg
Why?: The Kritzkrieg not only has a high charge rate than the standard Medi-Gun, but it grants the receiving player guaranteed critical hits for the duration of the deployment of the Ubercharge. This, combined with a Heavy, Soldier, Demoman, or Pyro can mean a lot of dead Robots.
Secondary: Overdose
Why?: The Overdose grants the Medic a speed boost as the Ubercharge increases. This can be very useful in allowing the Medic a better chance of escaping enemy fire, while also helping him quickly get to his patients in need. The drawback is that it does less damage than the standard Syringe Gun, but as the Medic's combat weapons are generally ineffective, only to be used as last resort, this makes little difference.
Melee: Ubersaw
Why?: Upon hitting an enemy with the Ubersaw, the player will fill twenty five percent of their Ubercharge bar. This can allow players to deploy their Ubercharges much faster, though the Ubersaw will not fill the Ubercharge meter if the player attacks a Robot Tank. The best enemy for the Medic to attack with this weapon is the Sentry Buster, as those are generally not hostile to anyone except the Engineer's Sentry Gun. So, the Medic can use the Ubersaw on it, without any fear of retaliation, allowing the player a quick recharge of the Uber meter.
Upgrades:
The Ubercharge is the most important thing to upgrade. Making it charge faster and stay deployed longer will benefit the team greatly. Not only will they be able to perform Critical hits longer (if using the Kritzkrieg), the Medic revives players almost instantly while using the Ubercharge. The Projectile Shield is also incredibly invaluable, as more difficult levels of Mann Vs. Machine have Giant Robots that shoot rapid fire, always critical projectiles. The Projectile Shield can negate them entirely. The Medic can also be upgraded to share his Canteens with players. Meaning if he gets an Invincibility canteen (Ubercharge Canteen), the player that he is healing will also become invincible when the canteen is used. This makes for an always critical hitting, completely invincible Heavy, which will level the playing field.
Sniper:
The Sniper is a difficult class to play as in Mann Vs. Machine. Since his attacks are slow and can usually only take out one enemy. With low health, and poor crowd control, the Sniper is less useful in Mann Vs. Machine than in regular multiplayer, with some gamers regarding him as almost useless. However, what the Sniper lacks in crowd control, he makes up for in raw damage output. In the hands of a competent player, a Sniper can take out a few Giant Robots on his own. While playing as him, only focus on the Giant Robots, and let the rest of the team deal with the crowds.
Primary: Machina/Sydney Sleeper
Why?: When fully charge, the Machina does more damage than the standard Sniper Rifle. In addition, its bullets penetrate multiple targets at once. The only drawback of this weapon is that it cannot be fired unless it is zoomed, but that's hardly an issue as the Sniper should never let his enemies get that close.
If your aim is not very good, consider the Syndey Sleeper as an alternative. When charged enough, enemies shot by this rifle will be coated in Jarate (see Secondary). This makes them more vulnerable to incoming damage from other players.
Secondary: Jarate
Why?: All enemies covered in Jarate will take mini-crit damage, allowing them to be easily picked off by stronger classes. Jarate can also be upgraded to slow down coated enemies. This helps taking out Giant Robots with the bomb.
Melee: Bushwacka
Why?: The great thing about the Bushwacka is that, where a weapon would usually only mini-crit, a critical hit is guaranteed. Jarate coated enemies thus become even more vulnerable to you. Coat Giant Robots when their backs are turned to you, and then go in for the kill with the Bushwacka.
Upgrades:
The Sniper can upgrade his rifle to do more damage and charge faster, allowing him to reach full damage potential quickly, or more quickly coat enemies with Jarate if using the Sydney Sleeper. In addition, he can be granted higher reload time, allowing him to fire off more shots. He can also upgrade his rifle to grant him "Explosive Headshots", which, upon a head shot, will cause an explosion, damaging or killing several enemies near the victim. Jarate should be upgraded to slow enemies down, and also to recharge faster, allowing it to be reused quickly. As the Sniper should stay away from enemy fire, upgrading his resistances are not as important as with other classes, but are also never a terrible idea.
Spy:
The Spy often receives more scorn than the Sniper from players in Mann Vs. Machine. With low health, the inability to attack from a far, lackluster weapons, and not great mobility, the Spy is often declared completely useless in Mann Vs. Machine. But such prejudice against him is unfounded. Much like the Sniper, in the hands of a competent player, the Spy can deal tremendous damage, sometimes even more than offensive classes. But, also like the Sniper, the Spy is almost entirely limited to attacking Giant Robots, so focus on them when playing as this character. With his ability to disguise himself as a the enemy, the Spy is great at snatching money undetected (keep in mind, though, that if you catch on fire, the robots will realize you're an enemy and attack). Thus, in earlier and more mild rounds, the Spy can support his team by being the Credit Collector. Keep in mind, however, that there should not be a Scout AND a Spy on one team. If someone else is already playing as one of these characters, then consider another class. It is worth mentioning that Sappers cannot be used continuously as in multiplayer. They must recharge after one is used.
Primary: Enforcer
Why?: The Enforcer does more damage than the default revolver. While the player will be generally overpowered against the robots while playing as the Spy, the Enforcer's damage boost will aid greatly in a jam where the Spy must fight. It has a slightly lower firing speed as the Revolver, but as this weapon should be used as a last resort, this is not concerning.
"Secondary": Dead Ringer
Why?: The Dead Ringer, when active, will absorb the majority of the damage dealt to the enemy, while simultaneously dropping a fake corpse and rending him invisible. Even for a short time after becoming invisible, the Dead Ringer will continue to protect the Spy from damage. In addition, the Dead Ringer will also extinguish fire and stop bleeding. This is very useful as enemy robots immediately detect nearby backstabs and will often target the Spy right after. The Dead Ringer will allow the player to get away from spotlight, heal if necessary, redisguise, and attack again quickly. Unfortunately, the Dead Ringer cannot be upgraded.
Melee: Default Knife
Why?: Unlike most knives, the Default knife doesn't come with a lower health penalty for the Spy, which is great, as he has low health to begin with. Your Eternal Reward, since it takes away the ability of the Spy to disguise manually at any time, is tricky to use as it requires the Spy to sneak up on an Enemy and backstab him without being killed by his robot bretheren. Also, since Robots will always detect nearby backstabs, they will always attack the Spy. They will quickly forget that he's an enemy if he redisguises, but the time it takes for this to happen may still be enough for them to do heavy damage to you.
Upgrades:
The two most important upgrades for the Spy are the Armor Penetration and the Attack Speed of his knife. Armor Penetration will cause backstabs to do more damage to Giant Robots, and Attack Speed will allow the player to perform multiple backstabs to certain enemies. It's also a good idea to upgrade the Spy's speed, allowing him to catch up to enemies, and retreat quickly if necessary. His Sappers behave differently than they do in Multiplayer. They have a radius in which they affect groups of small robots, essentially shutting them down for a few seconds. Giant Robots continue to function but are slowed significantly by Sappers (nearby regular robots will still be rendered completely vulnerable). They can be upgraded to have a higher radius and last longer. They are particularly useful at Sapping groups of Medics on Giant Robots, that can then be either picked off by the rest of the team, or quickly backstabbed by the Spy himself, granted his Attack Speed is high. Resistances are also very good for the Spy, allowing him to save the Dead Ringer for emergencies, while also allowing him to navigate the battle field without worrying about getting killed by a stray shot.
Conclusion:
General rules of Mann Vs. Machine
1 - Try to avoid duplicate characters. This is especially true with Spies, Snipers, Medics, and Scouts. You may really love playing as the Scout, but if there is already one on the team, then another is not necessary.
2 - Avoid too many support characters. Don't have a Spy, a Sniper, a Scout, and a Medic one one team. Your team's damage output will suffer greatly
3 - Don't be a jerk. Very often in Mann Vs. Machine, you will get put in a team don't always follow the first two rules. Try to suggest that any players playing as duplicate classes, or going as another support class change who they play as, but do so in a way that isn't hostile or belittling. A lot of players are inexperienced, and they won't really know what is the right thing to do.
Not everything in this guide is objective. Some of the weapons I have suggested may not be the "ideal loadout" for others. Try experimenting with other weapons. But always be sure to check what the weapon's draw back is. If the weapon comes with a damage penalty, or a bleed ability, then it may not be the best weapon for MvM.
But overall, the arsenal suggestions in this guide are generally identical to what most players of Mann vs. Machine will suggest (more or less). Following this guide will help not only defeat the Robot menace, but also might prevent you from getting kicked out of Game Lobbys by players.
This guide need major rework. There are many bad suggestions here.
ReplyDeleteCan you be a little more specific? I don't mind disagreeing comments, but I can't "rework" the guide if that's all you're gonna give me.
ReplyDeletescout:
ReplyDelete-scout gets a defined amount of cash per pile of cash regardless of value of the pile. the amount of health seeems to be 50 at sub 125 health and 25 above that. Then at even higher health it is lower. Not 100% sure
-primary weapon choice of the scout does not matter
-force a nature allows for bomb reset and 3rd jump
-soda popper allows for 5 jumps
-baby face allows person to save 600 credit of run speed
soldier:
-this section regarding beggars is completely wrong
-the best ability of beggar is not the ability to fire a barrage of rocket but its ability to have a bottomless clip. beggars with max reload speed allows a player to simply tap left click for a continuous 1 rocket shot.
-escape plan and displanary action is better the default. If there's a med then you shouldn't be running away.
-clip size is one of the worst upgrade you can get on beggars
-you only need rocket spec not "few upgrades"
-speed upgrades are luxury upgrade on soldier.
pyro:
-backburner/phlog maybe default
-you shouldn't be airblasting that much to being with or at all. a dead robot is better than a robot being stalled.
-2ndary doesn't matter but detonator allows for detonator jump which is nice for shortcuts
-melee weapon doesn't really matter but power jack is faster move speed which stacks with max move speed to get to places very fast. 10% damage isn't going to effect you as your will have the primary out when actually in combat.
-3rd degree- when will you actually have a crit canteen for that exactly situation? you have better luck with random crit and hoping and if it fails just pop them. but it isn't your job to worry about uber meds anyways. as pyro you should never be spotted until already in combat or after you started killing enemies
demo:
-anything goes here or just booties for more health
-any 2ndary works
-melee: default or eyelander
-the speed debuff is a dumb thing to have and speed upgrade is a luxury. you will hardly ever cash in on the extra damage of the skullcutter and if your going demoknight, a max damage any meele other than skullcutter will do more damage than the skullcutter.
-you shouldn't be upgrading both sticky and primary at the same time. upgrade 1 thing and stick with it for the game.
heavy:
primary: default/brass beast
-why are you so worried about his ammo capacity? 1 ammo capacity is good for 2 firing speed upgrades and 2 ammo cap is good for max firing speed. (or even 1 ammo cap is enough for max firing speed depending on your engie.
-resis is more important on heavy than other classes and he can't move when in combat. His large health pool doesn't matter if there are things comming his way. Other classes are much more mobile than heavy and can dodge more easily than heavy.
-Rage upgrade's usefulness is only in 2 areas. Bomb reset in a pit or some area. or reset bomb when it's about to be deployed. Otherwise do not even use the rage.
engie:
-any primary works. pompson for giant med if the team wants it, rescue for easier transport and options with the buildings, frontier for revenge crit (imo doesn't really work well), widow maker for fun
-the first thing engie should upgrade is dispenser radius. Metal is not important as you can manage your sentry easily with 200 metal. Also sentry ehalth allows it to survive the 10 rocket barrage instead of dying to 3. 300 metal is enough to build the basic buildings and 400+ just lessens ammo management. dis radius --> sentry health --> wrench speed --> ammo cap (maybe 1 or 2 ammo cap before wrench speed if you are having problem with ammo)
-upgrading primary on engie is luxury and reload speed is much better than clip size.
First of all, thank you very much for your thought out reply. I intended this blog to be a place to discuss strategies and such for games, and your reply definitely achieves that. I don't particularly care for the mildly insultive tone of it, but regardless, I hope people can read both of our suggestions and come up with their own loadouts based on them. The tricky thing about Mann Vs. Machine is that there is no true, objective guide. But to add the discussion, allow me to reply...
DeleteScout:
I suggested the Back Scatter because it can Mini-Crit. The Force-A-Nature technically can reset the bomb, but you have to be very accurate and have excellent timing for that to work, especially since there's a delay in the knock back effect. Baby Face Blaster's effect restricts you from double jumping, or you'll lose some of your speed and you start off slower with it. The multiple jumps of the Soda Popper can be useful, but, in most instances, will be overkill.
Soldier:
I see your point about the Beggar being able to fire one rocket constantly (though, with high enough Reload Speed, couldn't all the launchers technically do that?). That being said, I don't see the harm in spending some more to be able to shoot more rockets if you need it. You'd do more damage, and if you've been saving some for Rocket Specialist, then you'll be stunning more robots (if not killing them).
The Escape Plan blocks the Medic's healing and causes you to take Mini-Crits, and you need to be damaged for it to actually make a difference. The Disciplinary Action does a lot less damage, and it's boost doesn't actually help you.
Speed isn't a luxury. In Mann Vs. Machine, where a lot can be going on at once, being able to "get there" is important. Whether the Engineer's teleporter was destroyed, or you realize that a robot snuck past with the bomb and is almost at the hatch, there are many ways in which speed is vital for all classes. Sure, the Soldier's rocket jumping helps, but raw speed is always great, and it's very cheap at the Upgrade stations.
scout:
Delete-a good scout in mvm only need move speed and crit resis to obtain all the money. The rest of the money can be spent in gun upgrades and milk. That being said it requires much higher skill than the average scout.
-the use of baby face doesn't stop you from double jumping. you do such high damage up close that shooting while in the 2nd jump usually will refill the speed buff near instantly. The downside is the start in which your speed is much slower especially should you die and have to get to the front again. The thing with the 600 saved is that it allows you to focus on milk early or resis. ex: wave 1 of hamlet, 2 jump max crit resis. this allows for max move speed and crit resis against the minicrit soldiers in the wave.
-I never put out objective guide I simply stated some of the choices there are instead of limiting just 1 said weapon. I also cleared out misconceptions.
soldier:
-beggars has a hidden 66% firing speed upgrade. This allows it to have the ability to fire continuously. The harm of spending more to fire more is it takes away from the core and important upgrades such as damage and ammo cap. The rocket spec stun on first upgrade. any more upgrade doesn't make the stun longer or stun robots around. the extra rocket spec will only increase radius by 15% per interval.
-the use of escape plan is to escape aka you are in a pickle. You need to get to the health path in the next second, not 2 seconds etc etc. The use of blocking healing doesn't matter as much as you can just switch the weapon for the healing. Minicrit is negated once you have crit resis and even then once your low enough health you will die anyways if you stay in the current situation. its just better to run away and the speed boost helps greatly.
-speed is a luxury for soldier. max move speed isn't fast enough for soldier to dodge enough. Stacking max move and conch is enough for a soldier however to be quite a bit of the robot as they have a harder time tracking him but that is done much later in game. It is an luxury upgrade because it isn't more important than the actual rocket launcher upgrade.
Scout:
DeleteI mostly agree, or at least see your point, so fair enough.
Soldier:
I see your point about the Beggar, and will simply state that upgrading Clip Size has never caused me issue personally. With a great team (specifically, a great Scout), I've been able to max damage, and mostly upgrade both Clip Size, Ammo Limit, and Reload Speed. But, if your way works for people then that's great too.
Agree to disagree on the Escape Plan. I've actually experimented with both the Escape Plan and the Equalizer, and both times the guying playing as Medic told me having those at some point, because they were trying to heal me and they couldn't. I was using the Escape Plan to actually run, the Medic tried to heal me, and when he couldn't I died. If you have a Medic on the team, I say don't use the Escape Plan, because a Medic worth his salt should be checking on everyone, but that's just me.
Agree to disagree about speed. I never said anything about dodging. As a high damage class, the Soldier needs to "be there" at certain points, and it helps if he can "get there" fast enough. You don't dodge in Mann Vs. Machine, you normally just run away, because you can't dodge a hailstorm of bullets. I just find Speed cheap enough to upgrade (even if only slightly, you don't have to max it) and doing so at the Stations causes you to have more without Mini-Crits.
-If your guide is about what works rather than what is best then there is no point in debating. 1 shot beggar is the way to play beggar. not load up rockets. The other way is only good during situations of around the corner burst rather than continuous rocket against bots.
Delete-if you can't use escape plan realize a med is trying to heal you then you need to be more attentive. I never had a problem with a med that tried to heal me when they did. I will almost always know when they are coming and when they are not. if you are running on low health and the med is next to you. then you should immediately switch to the 2ndary or primary.
-speed is a luxury. it takes away from the primary weapon upgrades early game. positioning can be done without move speed upgrades. and you can dodge in mvm. a conch soldier can survive hordes of crit boost soldier because the crit soldier have a harder time tracking him while he's doing damage to the robots. as for true dodging of bullets you just hide behind a wall.
This isn't a debate. It's just a friendly discussion. In a very real sense, there's no 'right' way to beat Mann Vs. Machine.
DeleteWe were on Mann Works, and the Medic was on the second floor of that building near the Robot Spawn. I had enemies firing at me and I was more focused on escaping. But that was only one reason I dislike the Escape Plan.
You don't need to upgrade Speed immediately, since the first waves are typically easier. It becomes more necessary later, where the waves get harder, especially in Manhattan where there are Control Points. Positioning can be done without Speed upgrades, but they can be done faster and more efficiently with them.
Also, I'm always using the Buff Banner as the Soldier, not the Conch. The Banner really helps with the Tanks.
-there are some things that are just inefficient in mvm and will cause other member of your team do the damage you are not doing.
Delete-the use of escape plan isn't to run directly away from robots. it is use more to a location at low health. health pack or corner to avoid fire and live.
-if you dont upgrade speed immediately then you have 20% less move speed if using skullcutter. Why are you hurting yourself for little or no benfit?
-a beggar soldier can solo tank without the use of buff though may have difficulty in 666 and big rock.
i recommend you check out some of the gameplay I had with my friends. some of the people there are considered to be the top mvmers if the score board has hacked and or hell-met then watch them. https://www.youtube.com/user/kevin28115/videos
edit: i will note that I do not edit my clip and it is just there for others to see.
Deletemedic:
ReplyDelete-primary on med doesn't really matter but I will note that move speed is only when weapon is active
-depending ont he med's use of ubersaw the duration upgrade may be a better choice. Though the first upgrade should always be 1 sheild upgrade. also stop mentiong heavy like he's the go to class. Heavy's best ability is giant killing and if there are many robots out, you are better off criting a demo or soldier.
-during share canteen you can go for ubersaw and the person receiving the uber will still be ubered along with you.
sniper:
don't make guide about a class you don't understand at all
-primary: hitman,bizaar bargain,
-2ndary- jarate, cozy camper
-sniper is THE best crowd control in MvM small robots just die.-
-reload speed + explosive headshot and sniper is op as it is. damage allows for more damage headshot vs giants. charge rate is good during the aim but with hitman and sniper in general you are trying for headshot after headshot not charging up for a shot. really. what happens if you miss that shot which took 3 seconds to charge.
spy:
-primary- ambassador, diamondback
-knife- default/big earner
-upgrades should be max move speed for money collection without scout then max knife pen. knife speed is nice to have after that. sapper isn't that useful and 1 upgrade is enough for it's job.
-you should not be saving DR and relying on resis. DR is there to get out. use the DR for money collection if it's in crossfire you have plenty of time. just don't stand in front of 30 rockets. Resis is much lower on spy's list of upgrades
conclusion:
-duplicate classes are great to an extent. 2 bad scouts will never be good but 2 great scouts can be great.
-what are you talking about. the only true support class is medic.
if you have any questions. ask
Continuing...
ReplyDeletePyro:
Airblasting resets the bomb. In moments of high pressure, airblasting can buy you time. If you have a Pyro on the team, he needs to be able to airblast. I've been in games where this has been a godsend. The Phlog is good for taking out Tanks, but it's inability to airblast is a major hindrance. If there are two Pyros on the team, one should airblast and the other should Phlog.
As for the Third Degre - You'll have a Crit Canteen for exactly that situation if you save it for that situation. The game tells you what robots you'll be facing at the beginning after all. You simply hide, wait for the Giant and his Ubers to show up and then pop the Crit and finish them all in one blow, guaranteed.
And the Uber's are everyone's problem. Because they can cause you to lose the game fast if they're not taken care of.
Demoman:
The Skullcutter does more damage and has a higher range, and it's drawback is easily negated. If you don't want to deal with the drawback, then I'd recommend just using the default Bottle or the Persian Persuader (even though the Robots don't drop weapons). Most of the other weapons have a Lower Health drawback, which can't be negated with Upgrades, or cannot be "sheathed" unless you kill something with it.
Why shouldn't you upgrade both the Sticky Launcher and the Primary? Sure, upgrade the one you use more often more, but that doesn't mean you shouldn't upgrade the other a little. I usually upgrade the primary, but I will often at least upgrade the firing speed and reload time of the Scottish Resistance so I can set traps quickly.
Heavy:
Why am I worried about his ammo capacity? Because a Heavy that runs out of bullets is useless. You want to be able to fire for as long as possible, and there won't always be a dispenser handy, especially if there's a lot of Demo and Soldier Bots. Firing Speed will mean that your bullets will dry up quicker.
A fair point about the Heavy's slowness while firing, but that can more easily be resolved with Health On Kill upgrades (which are less expensive than most resistances). A horde of Scout Bots, or really any group of Robots, basically become hordes of healing.
I mostly agree about the Rage, but would further add that Rage is even more unnecessary if there's a Pyro who can airblast to do those very things you mentioned.
Engineer:
The extra metal is for rebuilding, more than maintenance. If your buildings get torn down, for what ever reason, you need a lot of metal to at least place them down to use a Building Upgrade on them. Spawning a Sentry alone takes I think somewhere around 140 metal. Without the extra metal, you have to go searching for an ammo box and by then you've wasted a lot of time. Not to mention that the extra metal makes upgrading faster if you don't have a Building Upgrade canteen for whatever reason.
pyro:
Delete-airblast is much less used than you think. if you have time to airblast small robots then you can kill them. The use of it is reset but unless your team is in that desperate of a need. then killing is a much better option.again dead robots don't walk. airblasting is not a role of pyro. if there are 2 pyros then they shoudl kill robots not keep on setting them back.
-crit canteen vs meds. Why don't you have a dedicated med picker on the team? if he fails then pop them early. You lose part of the front of the map but you can easily recover from that. Otherwise wasting 100 credits isn't really going to help you later in the game.
demo:
-the use of 200 credits isn't earlygame to negate a weapon choice you will almost never use. (persian is never an option in mvm.) The use of eyelander is to obtain 4 heads for move and health bonus. Otherwise I stated default as the best option. You don't need the range you need to be able to move around unhindered.
-you do not see the consequence of up being able to less damage overall? if you upgrade 2 reload speed on primary then you give up a damage upgrade on the sticky. or vice versa. most mvm players will main the stickies and for good reasons. upgrading 2 weapons in mvm will most likely get you kicked in mann up
heavy
-why are you worried about it as your primary upgrade when you have an engie? if the engie isn't doing his job then tell him to start or kick him. You can leave dispenser until about 75% of the ammo is used up then go back to get more ammo. It isn't that hard to do.
-about health on kill. you can't tank 20 rockets without resis. no health on kill can stop that. resistance isn't about slow coming damage its more about surviving bursts.
-rage can reset when the bomb is in deployment aka the animation has started. pyro can not do that. rage also works better vs giants. again only useful if team is that bad or gets pushed that far.
engie:
-increase health allows your sentry to live.
-if rebuilding the sentry is such a high priority then you are doing something wrong or your team is failing you. max ammo isn't more important than keeping the current sentry up alive longer. worst comes worse you build the sentry right next to an ammo pack. dispenser + sentry takes 230 metal combined which is 1 ammo upgrade. also you can build the sentry next to your dispenser.
Pyro:
DeleteDead robots indeed don't walk, but if you can delay the bomb or reset it, you might as well have a weapon that can do that. And you don't always have time to deal with them, especially if you have Tanks and Giants to deal with at the same time. You airblast the bomb away, buy time, and then deal with the higher threats. I have, personally, never been in a game where airblasting was extremely useful in some ways, and not just as a desperate effort to keep the bomb away from the hatch.
I never said don't have a "Med Picker". I suggest the Third Degree partially because it grants that very ability. Also if the designated "Med Picker" fails, for whatever reason, then it's a good back up plan.
Demo:
Fair enough, though I don't think the two hundred credits is a big deal to have a more powerful weapon. The problem with the Eyelander is that it causes you to lose health, and even if you get four heads, you'll lose your bonuses if you die, and you won't have the time to go "head collecting" later. So, I think we can agree that the Default is probably the best in some cases. I generally use the Scottish Handshake, myself, but started using the Skullcutter,
I do see the consequence of that. However, I personally never upgrade the damage on my Scottish Resistance because I use Crit Canteens to lay death traps for Tanks and Giants with Uber Medics. Do a lot of damage to the Giant or Tank, and guaranteed kill of the Medics. I've gone through several Mann-Up tours and have never been kicked for upgraded both at some point in some way.
Heavy:
The Engineer doing his job wasn't really my point. Dispensers can be destroyed, or you have to fight else where. And if the Engineer is either dead and respawning, or busy protecting his Sentry from a buster, or some reason, he won't get the Dispenser to you right away. In which case, you'll be glad you have that extra ammo.
Fair enough about the resistances.
I've seen the Pyro airblast robots who have started their "deploying" animation. I've even done it myself.
Engineer:
Prepare for the worst. Sentries can just go down sometimes, even if everyone is doing their best, and that's not even including the Teleporter and the Dispenser. We'll have to agree to disagree here, because, personally, more metal has always helpful.
Also, if your Dispenser is next to you and the Sentry, wouldn't that mean it's not near the Heavy, who should be closer to the frontlines? The Heavy can't be too far back or his gun becomes less useful due to bullet spread.
Why does Blogger not let me edit my own comments?
DeleteWhen discussing the Pyro, I meant to say I've never been in a game where airblasting WASN'T extremely useful.
-if your team is having problem keeping the robots back then airblasting will not solve the problem. It will simply delay it. killing the robots and allowing the bomb to advance a few more feet is better than reset and letting the bomb carrier level up.
Delete-if there is a tank a pyro can solo it. tell the other 5 teammates to keep the robots back and get off the tank. You shouldn't have to worry about the bomb.
-The thing about airblast is that the worse the team the more the team CAN benefit from airblast.
-backup plan to demo failing to kill meds. flame meds until they pop and run away. Come back 5 seconds later to finish the job.
demo:
crit canteens is never needed. just do without them. It hurts you later in game.
-if i see someone upgrade both sticky and launcher I will call out on it. and 90% of the time I either kick them or take their slack. They are ineffective in crowd control.
heavy:
I dont' care if you have to fight elsewhere. the concept is to learn to ammo manage. when 75% of the ammo is gone. pick a good time to retreat and get ammo. Or the engie should move his stuff depending on the team location.
pyro's airblast. Maybe they fixed it where you could airblast with animation now.
engie:
if sentry goes down then plop one down and rebuild. wrench speed will help more than ammo cap. and if dispenser is up. then build by dispenser or near it. yo uget 60 ammo at once from level 3 dispenser.
-your dispenser is near the front line along with your sentry.....
your sentry can tank better than the heavy early game because of the shield.
I disagree. I was playing Coal Town on either Advanced or Expert (can't remember), and we were nearing the end, when the Robots managed to slip through. Giants were coming, and one robot had the Bomb. The Pyro airblasted him into that one hole near the hatch and reset the bomb, buying us time to focus on the Giants and regain footing. I stand by my position that airblasting is a must for the Pyro. All teams of all skill level can benefit from it.
DeleteIf the Pyro has the Phlog, certainly he can. I sometimes switch to the Phlog on Tank rounds for this very reason.
If the Demo failed to kill them, they're probably severely damaged. One whack or two with the Third Degree will finish them off. Gets the job done, and saves primary ammo.
Demoman:
Crit Canteens for Tank. Or at least the Kritzkrieg. You can do without them, sure, but they're very helpful.
You use the Primary for the Crowd Control, and the Secondary for Tanks and Medics (and Bomb defense if necessary). The Loch-N-Load bats away loads of Robots when they're grouped together (which the Robots tend to do), and then the Secondary can be upgraded to quickly lay traps. That's all very useful and makes the Demo more versatile. If you kick somebody for that, all I can say is that I truly think that's a shame.
Heavy:
Managing ammo is important, can't argue against that. My only point is you'll be searching for ammo less if you have more. And the Engineer should move his buildings, but sometimes that just isn't possible.
Engineer:
That's all fine, but that's assuming you've spent money on the Building Canteen. If you haven't, then you're going to be in trouble, as you still need to upgrade your buildings to be effective. Prepare for the worst. Yes, if your team is good you shouldn't have to deal with it, but in case it happens, you'll have the metal needed to get the job done without spending additional Credits on Building Canteens later.
The Engineer is typically further back than the rest of the group or hidden to prevent enemies from targeting him and his buildings immediately. The Robots face the rest of the team, and the few that slip by are picked off by the Sentry, and when the Giants come, you Wrangle the Sentry and fire at them. Because of that, his position may not be the optimal position for the Heavy, so you sometimes need to have the Dispenser either with the Heavy or back at the Sentry. The Dispenser being with the Heavy is great, as he'll have infinite ammo, but it will leave you without a constant source of metal. This is negated more by having more metal, or the Heavy having more ammo.
Indeed, the Wrangler is a very effective tool.
-so in this situation your crowd control wasn't doing his job fully and the robots broke through.
Delete-the map in coal town allows for full bomb reset instead of partial which means that the bomb will not level up
-airblast is not a must for pyro. I have said that the weaker the team the more benefit the team can benefit from it. The opposite is true at well. the stronger the team the less the team will benefit from it.
-if a demo fails to kill a med then the med should have popped if they haven't been poped then they have considerable health left. use the 3rd degree isn't going to guarantee the kill and crit canteen is still a waste. as for saving primary ammo. you are using about 30 ammo max which is not much at all
demo:
- why don't you just use stickies for both? why are you making both weapons weaker? what versitility are you talking about? a sticky bomb can do crowd control better than the primary. why not just use sticky for everything? spending money for reload speed and firing speed when you can upgrade damage of the main weapon of choice. It isn't a shame when the player can not do nearly as well and is making others pick up for the loss of damage.
heavy:
-why are you searching for ammo? you should know the ammo location and when you have used up most of the ammo and found a good stopping point you should know the location of the dispenser or ammo packs in the map.
engie:
I don't play engie with canteens at all now and will only do so in later waves when I feel lazy
-you need to learn how to manage the resources you have available to you. and do your best to not let your buildings die.
-1200 credits allow you to 3x the sentry health. then adding a shield which reduces damage by 66% makes it able to tank burst fire soldier.
-max ammo is overkill early game because if your sentry goes down and you have to rebuild its going to take longer and you are less useful to your team.
- an engie's building should be the first thing targeted by robots so your team can easily take advantage of it. You should be farther back so the robot fall off damage doesn't destroy the sentry but should never be hiding it. If your team is good enough then you can have the sentry all the way up front.
Continuing again
ReplyDeleteMedic:
Traditionally, the Heavy is the "go-to" Medic Buddy. But, sure, a Soldier, Demo, or Pyro are just as effective.
Sniper:
At his very core, the Sniper is not good at crowd control. His has low health, his weapon is for single targets, and his other weapons aren't that great. True, Explosive Headshots are great, I mentioned them in the guide, but you have to be a good shot to get them to work. Now, this isn't so hard with Giants, as they're huge and slow, but smaller robots have a tendency to move around more quickly and frantically (unless they're Heavy Bots). And since Giants are so slow, they are, in most cases, fairly detached from their smaller brethren, unless they're flanked by Medic Bots. I'm not saying don't get Explosive Headshots by any means, but, if I'm gonna write a guide, I have to take into account that not everyone is an amazing shot, which is why I suggest the Syndey Sleeper, as it makes more novice Snipers more effective by making enemies more vulnerable to damage.
Spy:
Getting Headshots with the Ambassador can be difficult, and the gun, if you use the Dead Ringer properly, shouldn't even really be necessary. The Diamondback I actually thought of endorsing, but since the Spy should focus on Giants for max effectiveness, you probably won't get that many Crits for it.
Technically, all classes should get resistances, especially on higher difficulties (where it almost becomes a necessity). But, yes, the Dead Ringer does make it less necessary for the Spy, but I would recommend getting resistances anyway, because you never know when a stray Crit rocket may come your way.
Conclusion:
True, but a great balanced team tops all.
At the very least, Scout, Medic, and Spy are Support. Scout, because he indirectly helps by gathering money, slowing enemies down with his Mad Milk, and Marking them with his Fan or Ball. Medic for obvious reasons. And the Spy because he's only good against Giants.
sniper:
ReplyDelete-if they can't hit headshots then don't play sniper. also reload speed helps more for those who miss headshots as it helps with the recover time.
-sleeper's minicrit is helpful but there are other sources of minicrit that adding on to that isn't going to help nearly as much to the team as outright headshot damage.
spy:
-amby is used to deal with robot snipers not against normal robots.
- spy shouldn't only focus on giants. it is the priority target but if there's moments then go for the common robot stabs.
-You know as spy when a stray something will come. If your in disguise then you will not be hit unless you walk into crossfire. If you have broken it then expect all robots to target you..
conclusion:
-a scout can do over 70k-100k damage per game
-a spy can do even more
-if your saying that spy is support because it only can deal with giants then it is partially true. You are missing the fact that spy is giving up crowd control for the best giant killing ability in game.
-there is no balanced team. go with 3 demo, 1 pyro/heavy (depend on map), 1 scout, 1 engie and it will be extremely easy. but with good players then anything will work. personal skill is much better than team composition.
Sniper:
DeleteAgreed, but, again, this is a general guide, not one for only hard-core experts. That, and even a Sniper with notso great aim can still be a great team member with the Sleeper.
Spy:
Why wouldn't you just backstab the Robot Snipers? Wouldn't that be easier/faster? You're most likely always going to be disguised. The Enforcer is mostly for Tanks, but even there you can just use your fast swinging knife.
Robots detect backstabs. They will instantly target you if you backstab one of them. Each time you kill a normal robot, you have to then pull up the Dead Ringer, get out, redisguise, then go back in. Which, at the very least, means you're a lot slower at crowd control and less effective at it. You're better off sticking with Giants and Sniper Bots in my opinion.
Conclusion:
Never seen a scout do that much damage. I have actually seen one person use screenshots he took to demonstrate that the Scout is not for damage in Mann Up Mode or Mann Vs. Machine in general.
Agreed with the Spy. Spy is amazing if done right.
Giant Killing is what the Spy is mostly about.
Team composition is the heart of Team Fortress 2. True about player skill, but that skill with a balanced team will always be the best, in my opinion. We'll have to agree to disagree otherwise.
-if a person can not carry their weight in a class they are playing they have to have team consent to carry them. or they can go a lower difficulty to practice.
Delete- sleeping allows minicrit which a soldier and scout can do. it's redundant.
-spy is ineffective at crowd control and the robots takes about 1 second before noticing you. However it makes all robots toward you allowing your team to focus and kill the bots.
scout can do over 100k damage in manhanttan.
3 demo 1 scout 1 engie 1 pyro/heavy.
that is all the essentials of mvm and then some.
I'm not saying the Scout can't do that much damage, but I've never personally seen him do it, even on the best of rounds.
DeleteAnyway, for the most part, I think I've said my piece on this.t. Thank you, again, for your commentary. Good luck beating against the Robot menace if you still have tours left! :)
What I'm commenting here for isn't just to debate. Its so other reading it doesn't form bad habbits in mvm. you can not let your personal skill dictate something is good or bad you have to think of what is is capable of. If this guide goes unchanged then it will be one of the worst guides for mvm out there.
Deletehere is a screenshot of 2 scouts doing what they are suppose to be doing.
http://steamcommunity.com/sharedfiles/filedetails/?id=238372310
you can browse the other screenshots if you wish.
I'm sorry you feel that I'm doing everything wrong here, but I made this guideoff of my own personal experiences, suggestions from people I've played with, and even other guides and discussions. If you don't agree with it that's perfectly fine, and I'm glad you've offered your critiques for others to see so that they can make up their own minds. What I offer has gotten me through advanced and expert difficulty levels. It's worked for me, and it's worked for others.
DeleteI stand by my guide, and it will stay the way it is. If you think it's terrible and awful, then by all means create your own. I don't say that out of spite or ill feeling, but genuinely. I love reading guides for MvM to see what others have to say and what's worked for them.
It's what a community does, after all.
as you play mvm and actually learn mvm please see if your guide doesn't start changing. I am not talking about tour count I mean actually learning the core of mvm.
DeleteThere are very few guides out there that is actually considered good and most of the guides out atm are horrible. Many guides are similar to this one (take no offense please) and the people who have wrote the guide doesn't understand mvm fully. What I will say good about this guide is that you did not say no spy/sniper/pyro but just gave out loadout suggestions.
I will give an example of a said good guide that has been modified in the past year. the guide originally called for spy to max sapper and not upgrade knife first. After an year the person changed the guide to upgrade knife. I have said in the comment a year ago about this and he debated furiously against it so eventually I didn't care anymore. The guide is well known but the change imo came too late but better late than never. I later played with the person in game and he was not an exceptional player. He was just better than the average pub player.
I'm not going to tell you what to play or do but imo people will reach a point in which they will realize what I have said to make much more sense.
happy gaming.
basically what I'm getting to is. if you do not do your role in mvm then others will take it upon themselves to do it for you or the robots will break through. Be the best you can so that other can have fun too.
ReplyDeleteI'm not saying never do other things but always be mindful of your teammates. Whatever you do less. someone has to pick up the slack.